


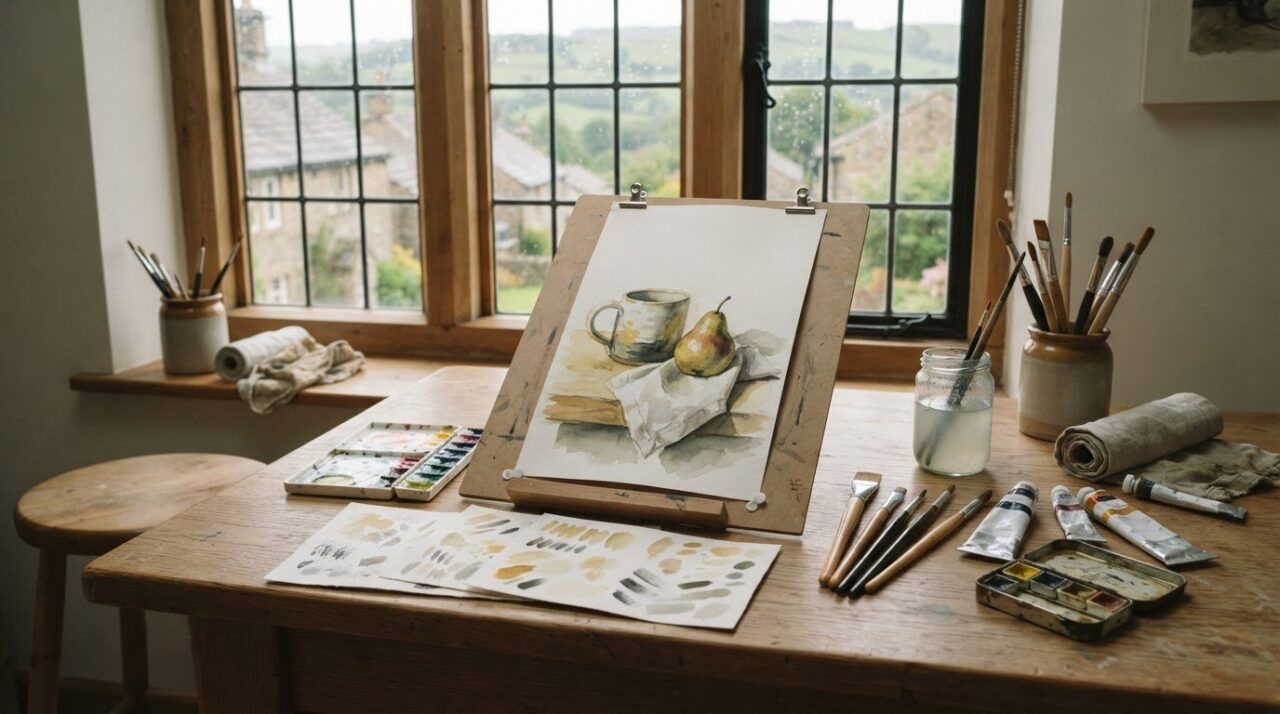
A muddy colour or a brushmark that refuses to behave doesn’t mean you lack artistic ability. It usually means you’re still learning how paint, water, brushes and surfaces respond. The most useful beginner painting techniques start with observation and simple control, not a search for a personal style or a perfect first picture.
If you’re unsure which materials you need, or feel frustrated when paint does something unexpected, you’re in good company. Painting has a learning curve, and early results are information, not a verdict on your talent. You don’t need to master every technique at once.
This guide covers a manageable set of fundamentals: looking closely at shapes and light, mixing colour with a limited palette, and practising brush pressure, layers and edges. You’ll also find a repeatable exercise and ways to learn from mistakes, so each session has a clear purpose. Take the steps at your own pace and let confidence grow with practice.
Key Takeaways
- Practise one small skill at a time instead of aiming for a perfect picture.
- Compare watercolour, acrylic and oil by their working pace, layering options and surface requirements.
- Use a familiar object for a short exercise, moving from careful observation to simple shapes and a first layer of paint.
- Keep dated studies or brief notes to see how your choices and confidence change with practice.
- If personal guidance would help, lessons with a qualified art teacher can offer tailored support as you learn.
Beginner Painting Techniques: What to Learn Before You Pick Up a Brush
You don’t need to produce a polished picture straight away. Painting skills develop as you learn to look carefully, make choices and practise. An unexpected mark is part of that learning, not proof that you’re not artistic. A painting technique is a deliberate way of applying, moving or layering paint to create a particular mark or effect. The term covers simple brushstrokes as well as approaches such as glazing and drybrush, which you can explore in this glossary of art techniques.
Paint doesn’t behave in isolation. The medium affects its working qualities, the surface affects how it sits, and the brush influences the mark. A soft watercolour brush on paper won’t respond like a firmer brush on a primed canvas. Practise one element at a time so you can see what changed and learn from the result.
What should a beginner notice before painting?
Before drawing details, look at a simple object such as an apple or a mug. Notice its largest shape first, then where the light falls and which area is darkest. Look at the outline, at sharper or softer edges, and at places where the colour shifts. You might see a warm highlight on one side and a cooler shadow on the other.
These observations give you a practical starting point. Focusing on small details too soon can make it harder to judge the overall shape. Use broad strokes for large areas and smaller ones where an edge changes. You don’t have to name every colour or copy every detail. Start with what you can clearly see.
Which painting materials are enough to begin?
Choose a small set that suits the paint you want to try. You’ll usually need paint, a few brushes, a suitable surface and a palette or another way to mix colour. Add water and a cloth for water-based paints, or the appropriate cleaning materials for your chosen medium. You don’t need a large collection to practise basic control.
- Watercolour is often worked in transparent washes on paper, with the white of the paper contributing to light areas.
- Acrylic paint dries relatively quickly and can be layered once dry. Choose a surface intended for acrylic use.
- Oil paint generally stays workable for longer, allowing more time to adjust marks. Use a surface prepared for oil painting.
None is the universal right choice. Consider whether you’d enjoy transparent washes, quicker layers or a slower pace. Always check the paint and surface product instructions for compatibility, handling and safe use. A few suitable materials and time to observe are enough to begin.
Build Control with Colour Mixing, Brushwork and Simple Shapes
Before mixing paint directly on your painting, make a few small tests on a spare piece of the same surface. A simple chart lets you see what happens when colours meet without the pressure of getting it right first time. Label each test with the colours used and note what you see. For example, mix a little blue into yellow, then add more gradually and compare the changing greens.
How can beginners practise colour mixing?
Keep the chart simple. Try pairs of colours, then make a lighter or darker version of one mixture. Compare the results side by side. You might describe one green as warmer and another as cooler, but these impressions are relative. A colour can look warmer beside a cooler neighbour, and the medium and surface can affect its appearance. Notes help you remember what you tried and make a more considered choice next time.
Value is the relative lightness or darkness of a colour. Compare the value of a mixture with the object you’re painting to judge whether it belongs in a bright area, a shadow or somewhere between.
How do brush pressure and direction change a mark?
Use a spare surface to test how your brush responds. Try a light touch, a firmer press and a gradual change between the two. A light touch may leave a narrow, delicate mark; pressing more can spread the bristles and make a broader one. The result varies with the brush, paint and surface, so treat each test as a chance to observe rather than a promise of identical strokes.
Repeat short strokes across the surface, downwards and along a curve. Notice how turning the brush or changing your wrist movement affects the mark. These trials build awareness of your materials and make it easier to choose a stroke with purpose. Clean and care for brushes according to the paint medium and product instructions, so residue or unsuitable cleaning doesn’t affect their condition.
How can simple shapes make a subject easier to paint?
Reduce a subject to a few basic forms before adding detail. A pear might begin as a rounded shape that narrows towards the top; a mug can be blocked in as a rectangle with an oval opening and a curved handle. Place these forms lightly, then check their size and position in relation to one another. This gives your first composition structure without requiring a precise outline.
These beginner painting techniques work best as short, focused experiments: mix a colour, test a brushstroke or simplify one object. If personal feedback would help you develop your approach, friendly art lessons for beginners with a qualified art teacher offer another way to learn at your own pace.

Compare Painting Techniques by Medium, Surface and Intended Effect
The same brushstroke can feel quite different across watercolour, acrylic and oil paint. The medium affects how paint flows, how long it stays workable and what you can do in later layers. The surface matters too: it influences how a stroke lands and whether a wash spreads. Consider the paint and its support as a pair.
| Medium | Working pace and layering | Surface to consider |
|---|---|---|
| Watercolour | Often used in transparent washes. A dry layer can be followed by another wash, though added water may lift or disturb some underlying colour. | Watercolour paper is made to handle water; paper weight and texture affect how washes behave. |
| Acrylic | Usually dries relatively quickly, so you can often add another layer once the paint is dry. Working time varies by product and conditions. | Use a surface labelled as suitable for acrylic, such as appropriately prepared canvas, paper or board. |
| Oil | Often remains workable longer than acrylic, allowing marks to be adjusted. Drying time and layering depend on the paint, how it’s applied and the conditions. | Choose a support prepared for oil paint, such as suitably primed canvas or board. |
How do watercolour, acrylic paint and oil paint differ for beginners?
Think about the process you’d enjoy rather than searching for a medium that’s best for everyone. Watercolour can suit someone drawn to transparent effects and visible paper. Acrylic may appeal if you want adaptable paint and relatively quick layers. Oil can suit a slower approach with more time to rework marks. These are broad tendencies, not guarantees. Formulations differ, and drying or reworking behaviour can change with the product, paint thickness and surrounding conditions. Check the manufacturer’s instructions for the specific paint you choose.
How should the painting surface shape your technique?
Paper, canvas and board aren’t interchangeable by default. A paper surface that buckles under a wet wash may make watercolour harder to control, while a surface not prepared for oil may not be suitable for that medium. Check product guidance before you begin.
Let the surface inform your brushwork. On absorbent paper, a wash may spread or settle differently than a stroke on prepared canvas. Test a mark on a spare piece of the same surface, then consider whether it supports the effect you want, from a soft wash to a visible, layered stroke. Matching surface to medium helps you understand what the paint is doing instead of mistaking the surface’s response for a lack of skill.
When choosing a medium for beginner painting techniques, consider your preferred pace, the effects you want to explore, how long you’d like to adjust marks and whether the surface is suitable for the paint.
Practise Beginner Painting Techniques with a Repeatable Exercise
A familiar subject makes it easier to focus on painting rather than working out a complicated scene. Choose a piece of fruit, a mug or another simple household object. The aim is to practise a sequence, not to produce a finished picture worthy of display.
A simple first painting exercise, step by step
- Look before you begin. Notice the object’s largest shape, its light and dark areas, and where its edges change. Leave small details for later.
- Block in the main forms. Sketch the broad shape lightly or place it with a few simple strokes. Check its size and position before adding more.
- Test your materials. Try a few colour mixtures and brush marks on a spare surface. Compare them with the object, then adjust your mixture or pressure if needed.
- Lay in the broad areas. Start with the main colour and shapes, building the image gradually. Let each layer suit your medium and follow the paint’s product guidance.
- Pause and review. Name one thing that worked and one change to try next time. This gives you a clear next step without judging the whole painting as a success or failure.
Unexpected results are part of practising. If a mark or colour isn’t what you intended, pause and identify the specific issue before adding more paint. Check the product instructions before attempting a correction or another layer, as suitable approaches vary by medium and product.
What should beginners do when a painting goes wrong?
Uneven marks and surprising colours are useful observations, not a reason to stop. Ask what happened: was the shape out of proportion, the colour mixture too strong, or the brush pressure heavier than expected? A small test on a spare surface can help you explore a correction before changing the painting itself.
Repeat the exercise with another familiar object as your confidence grows. If structured support would help, Brian Crosby Art offers lessons for beginners and improvers with a qualified art teacher. Explore Brian Crosby Art and its beginner art lessons to find out more.
Keep Learning Beginner Painting Techniques at Your Own Pace
Progress doesn’t depend on finishing a painting every time you sit down. Keep practice manageable by choosing one focus for a session, such as observing more carefully, mixing a particular colour or guiding a brush with greater control. A short study can be worthwhile even if it remains unfinished.
How can beginners make steady progress without feeling overwhelmed?
Return to a familiar subject as you practise different skills. Repainting the same mug, for instance, lets you notice how your choices change without having to learn a new subject each time. Date your studies and add a short note about what you were exploring, what you noticed and what you might try next.
Small observations are more helpful than judging the whole painting. You might note that a colour mixture looked different on the surface, or that a lighter brush touch made a mark you preferred. Treat each result as information for your next attempt. There’s no need to follow a strict timetable; return to the work when it suits you.
When might art lessons help a beginner?
Independent practice can be a rewarding way to learn, but individual feedback may help if you’re unsure what to focus on or would value a supportive structure. Lessons aren’t necessary for every beginner. Brian Crosby is a qualified art teacher who offers lessons for beginners and improvers, with guidance suited to the learner.
If you’d like to explore that option, visit Brian Crosby Art’s beginner art lessons and enquire about current details. Whether you learn independently or with support, keep your next step simple and give yourself time to notice how your approach develops.
Take Your Next Painting Step with Confidence
Painting confidence grows through patient practice, not instant perfection. Choose one skill to revisit, whether that’s looking closely at light and shape, testing a colour mixture or guiding a brush with more control. Keep a few dated studies or notes as a record of what you’re learning.
The most useful beginner painting techniques help you understand your materials and make deliberate choices. A mark that surprises you can still teach you something. Let each attempt inform the next, and give yourself permission to work at your own pace.
If personal guidance would help, Brian Crosby is a qualified art teacher offering lessons for beginners and improvers. Explore Brian Crosby Art’s beginner art lessons as an optional next step. Start with one small exercise, stay curious and let your confidence grow with practice.
Frequently Asked Questions
What painting technique should a beginner learn first?
Start by observing simple shapes and light and dark areas, then practise making controlled marks. These fundamentals support a wide range of subjects and paint media, making them a useful foundation for beginner painting techniques. Pick one small exercise and repeat it, focusing on a single skill rather than a finished picture. There’s no one technique every beginner must master first; begin with something you can practise and learn from.
Can beginners paint without formal lessons?
Yes, you can begin painting independently with suitable paint, a compatible surface and a few simple exercises. Lessons aren’t essential, though individual feedback or a clear structure can help if you’re unsure what to practise. Work in manageable steps, follow the guidance for your materials and note what you’d change next time. Choose a way of learning that feels encouraging and sustainable for you.
Which paint is easiest for a beginner to use?
There isn’t one paint medium that’s easiest for everyone. Watercolour, acrylic and oil each handle differently, and products within the same medium can vary too. Consider whether you’re drawn to transparent effects, adaptable paint or a slower working process. Then check the manufacturer’s guidance and choose a compatible surface. A small test on that surface can show you how your particular paint behaves before you begin a larger piece.
How do beginners practise brush control?
Make short lines, broad marks and small shapes on a spare surface that’s suitable for your paint. Try changing the brush angle and using lighter or firmer pressure, then pause to see how the mark responds. Repeat the exercise with your chosen materials. Brush behaviour depends on the brush, paint and surface, so use these trials to notice what happens rather than expecting every stroke to match.
Why do my paint colours look different after mixing?
A mixture’s appearance depends on the colours used, their proportions and the surface beneath them. Nearby colours and lighting can also affect how you perceive it. Before applying the mixture to your painting, make a small test and compare it with the surrounding colours. A labelled note can help you remember what you combined. Paint behaviour and appearance differ between materials, so follow the product guidance for your chosen medium.
How can I improve my painting without getting discouraged?
Choose one focus for each session, such as observing shapes or controlling brush pressure, and keep earlier studies or short notes to track your choices. Rather than judging the whole painting, identify one decision you like and one thing to experiment with next time. Mistakes can point towards a useful adjustment. If individual feedback would help, Brian Crosby Art offers lessons for beginners and improvers with a qualified art teacher.